Wednesday, October 31, 2012

Happy Halloween!

As promised, I have my roasted pumpkin seeds recipe for you today. It is quick, easy and suchhh an addictive snack!


I have discovered a secret... pumpkin guts sink and seeds float. Great news right!? Well, I think it is and I got pretty excited about it! Trust me, it makes cleaning the seeds a breeze. You can easily change up the flavor of your seeds with some curry powder, chili powder maybe even some smoked paprika if you are feeling adventurous.


Ingredients:
Fresh/ Raw Pumpkin Seeds
Salt
Pepper
Olive Oil
Parchment Paper

Method:
  1. Add a cup or two of water to the bowl holding your pumpkin seeds, swish them around a little, loosening the guts stuck to the seeds.
  2. Allow the seed bowl with the water to sit for 5 to 10 minutes. This will allow the pumpkin flesh/ guts to sink to the bottom of the bowl and separate from the seeds.
  3. Skim the seeds off the top of the water with your hand or a slotted spoon and place the seeds on 2 layers of paper towel to dry. (NOTE: Do not leave the seeds for longer than an hour on the paper towel... the seeds will fuse to the dried paper towel... I may or may not have been pulling seeds off paper towel last night for an hour)
  4. Mix your dried seeds in a bowl with 1 tbsp of oil per cup of pumpkin seeds.
  5. Add a 1 tsp of salt per cup of pumpkin seeds and a pinch of pepper per cup of pumpkin seeds.
  6. Spread seeds onto a parchment lined baking sheet and bake at 400 for 10 minutes. After 10 minutes, remove the seeds and flip/toss around the pan and bake for another 9 minutes. Watch the seeds in the last 3 minutes, remove before they get to dark in colour.
  7. Let cool and enjoy!
Happy Halloween and Safe Trick-or-Treating tonight!
xo
C


Tuesday, October 30, 2012

Power Drill Pumpkins

I think one of my favorite things about carving pumpkins is the seeds. I know, weird. Tomorrow I will show you my super easy, roasted pumpkin seed recipe- so hold only those seeds! You will then understand why the seeds make the mess of carving worth it.

I wanted to do something easy this year, and considering I bought tiny pumpkins, I figured puncturing a billion holes into them would be a lot easier than carving mini faces.

If you don't have a drill, you could use a hammer and different sized nails... in theory... but that might be exhausting. The drill was easy to use and quick to change up the sizes. It would probably be best to do this outside... I did it inside and pumpkin was flying everywhere- I mean, some-how-down-my-shirt-and-on-the-kitchen-cabinets everywhere. But its easy to clean up and will only take you 10 minutes to do three!


Start by cutting the stem of the pumpkin out, I found doing a zig-zag pattern the easiest which works because its clearly the prettiest! (ps. be careful!!!! It is very easy to cut your hand off!!!) Second, if you are like me and prefer to be organized, split your seeds into one bowl and your guts into another. If you are roasting the seeds this will save time down the road. Third, start with the biggest diameter drill bit (I used 1/4" dia.) and start poking holes- be VERY careful NOT to have your hand on the inside of the pumpkin. This would be bad. No holes in hands please. Do all of your pumpkins with the big drill bit and then go down to the middle size (I used 11/64" dia.) and then down to the smallest (I used 7/64" dia.). The bits can be a bit of a pain to change, so doing all the big holes at once, and so on will limit this annoyance.

Fill the pumpkins with x-mas lights, battery powered tea lights or a candle and you are off to the races!

Happy Halloween!

Monday, October 29, 2012

4 Favorites

Happy Monday!
Does anyone else feel like getting back into bed and sleeping for the rest of the day? The weather has been gross here and it looks like we are in for a whole week of it. No problem, I will just be forced to do my spray painting activities indoors... without adequate ventilation.... joking... kind of...

Anyways- how was your weekend? Mine was great, not as much cooking as I would have liked but you know, better luck next weekend! Below are 4 of my favorite little things right now on a rainy day.


1| The new Holiday Restoration Hardware Catalogue. I would like 3 of everything pleeease.
2| Grilled Cheese and Tomato Soup. Seriously, is there anything better on a crabby day?
3| Moksha Yoga 30 Day Challenge. I am on day 29 and it has been AMAZING.
4| A shot I snapped last week looking down the street from the end of my driveway- quintessential fall. LOVE it.

Have a great Monday everyone. Stay warm on this grey day!
C  

Friday, October 26, 2012

Chocolate Caramel Pops


When I was little Halloween preparation started months in advance. My mom and I would discuss Halloween costumes, how we should carve the pumpkin and what should be in the Halloween loot bags. That's right, we used to give out loot bags! Our house was on a corner and we got around 100+ kids a year. Inevitably we would run out of the bags because word would travel quickly that we were the house to hit and my dad would go rummaging through the cupboards to find alternative things to give out. Unfortunately one year he decided a good substitute was boxed raisins... obviously we got egged.
I lovvvved stuffing the loot bags- normally they consisted of a clear cellophane bag with 4 or 5 different candies in them, tied closed with a cute ribbon. FUN RIGHT!? I loved it. Needless to say its been a while since I have made Halloween loot bags to give out, but this is a fun recipe to make for a Halloween party or just to get into the festive spirit!

You can change this up with whatever you have on hand- I went with crushed, salted pistachios and orange candies to be festive, as well as some sea salt to balance out the intense sweetness of the caramels.


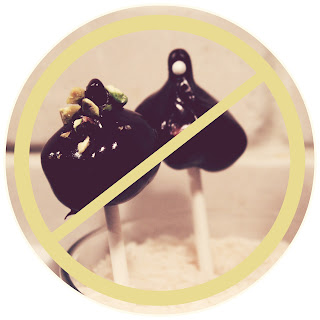
The secret to making this work is putting the sticks into the caramels and then freeze them for half an hour. I thought that it would be totally fine to just start dipping after I had poked the stick into the caramel and this is what happened:

The caramels get soft and slowly start to sink off their sticks to their death. Losers. They totally missed out on caramel, chocolate amazing-ness. Lesson learned for the both of us.


Once your caramels are frozen onto the sticks start dipping into melted chocolate and then top with your favorite ingredients. You will want to stick these into something so they can set standing up straight, I filled a vase with rice and that worked well. A Styrofoam block would also work perfectly.


Chocolate Caramel Pops

Ingredients:
- 1 cup semi sweet chocolate chips
- 1 cup white chocolate chips
- sea salt
- 1 tbsp chopped pistachios
- orange candies
- caramels
- lolly pop sticks (you can find these at craft or baking stores)
- a vase or bowl filled with rice to stick the drying pops in

Method:
  1. Start by unwrapping your caramels... this is slightly more annoying than I expected... but TOTALLY worth it.
  2. Push your sticks into the caramels and place them on a wax paper/ parchment paper lined plate and send them into the freezer for at least 30 minutes.
  3. Meanwhile... Start with one type of chocolate, and put the chips in a microwave safe bowl. Microwave the chocolate for 40 seconds, remove and stir, continue microwaving for another 15 seconds and stir. Continue to micro for 15 seconds and stir until the chocolate is melted. Repeat with the remaining type of chocolate.
  4. Now you are ready to dip! Swirl the caramels into the chocolate and quickly top with sea salt, nuts or candies.
  5. Place into your pops in a rice filled vase to set standing up. This will take about 30 minutes.
  6. Enjoy!

xo
C

Wednesday, October 24, 2012

Favorite Finds: GeometricInk

I stumbled across GeometricInk on etsy yesterday and was immediately entranced by Kara's gorgeous, original watercolour paintings. I mean seriously, are these not crazy-beautiful? I am loving them all, but am really drawn to the Geo Diamond. Something about the intense, contrast in colour and moodiness of it won't let me tear my eyes away. Agh. I Totally love these- enjoy!


one. Geometric Diamond
two. Geometric Feather
three. Geometric Buck
four. Origami Cranes Two Loves

... Did I mention that I LOVE these...?

Have a fabulous Hump Day.
xo
C

Tuesday, October 23, 2012

DIY: Mirror Update

I love this DIY. It's simple, quick and makes a BIG difference in your space. This mirror I inherited from my Grandparents, it was a little worse for wear and the goldish/copper finish wasn't exactly my style. I loved the bones of it- gorgeous curves and feminine flowers so I decided that with a bit of high gloss, white spray paint it would be perfect in our bathroom. You could look for mirrors like this at salvage shops or Goodwill. In our tiny little bathroom it makes the perfect statement and feels special to be reusing something my grandparents would have had up for years.
Final Mirror
1| Clean your mirror of any dust or cobwebs (mine had a few), using either TSP (found at any paint supply store or home depot) or a household cleaner if your mirror isn't too dirty. Sand down the frame if the existing finish on it is especially slippery.
2| Remove the mirror. I was pretty lucky, and just had to unscrew the backing of cardboard and mirror.
3| In a well ventilated space (outside) lay out your mirror. You may want to lift it up with erasers or stones so you can get right behind the frame.
4| Spray paint in light, even coats being sure to spray from all angles.
5| Allow the paint to dry and cure over night and reattach the mirror and backing.
6| Hang somewhere special and enjoy your handiwork!

Have a great Tuesday.
C

Friday, October 19, 2012

Favorite Things: Boston Edition

Happy Friday All!
I am off to Vermont for the weekend to visit my sister at her last homecoming of her University career. I am pumped for good food, gorgeous New England architecture and the Panthers winning the homecoming game!
Below are a few fave's from my Thanksgiving trip to Boston:


1- An amazing sea food restaurant we ate lunch at called Legal Sea Foods. I had a classic New England Clam Chowder and split (#3) a fresh Lobster Roll with my sis. It was all to die for.
2- A trip to Mikes Pastry in Little Italy left us with WAY to many Cannolis- mine was chocolate chip and the best I have ever had.
3- The best ever Lobster Roll, eaten beside the ocean.
4- This wasn't exactly in Boston... but I whipped up some egg whites for a cake on the Sunday we returned, so technically it was on the 'Boston Weekend'. This gorgeous copper bowl and gigantic whisk I picked up last year in Paris at THE BEST cookware store in the world, E.Dehillerin. If you are ever in Paris and love food as much as I do- this is a must visit. (Yes, I haled it all home in my luggage-I know, I am insane.)

Have a super fab weekend,
xo
C

Thursday, October 18, 2012

Salmon Quinoa Cakes

I have a yummy recipe for you today- it was my go-to this summer when I had random stuff in the fridge and left over quinoa. Its a simple and forgiving recipe- if you don't have the exact ingredients I used you can easily make substitutions.


Ingredients:
3/4 cup cooked quinoa
2 cans of boneless, skinless salmon
2 tbsp chopped fresh chives
1 egg, beaten
s + p
dash of cayenne
1 tsp lemon zest
1/4 cup of ricotta cheese
1/4 cup of feta cheese, crumbled
1/4 breadcrumbs
olive oil for frying

Method:
1. In a large bowl break up the canned, drained salmon until you have small flakes.
2. Add the whole list of ingredients and mix to combine.
3. Using your hands, press the mixture to the bottom of the bowl and draw and 'x' with your finger to portion the mix into 4 equal large cakes, or draw 3 lines (star/snowflake shape) to portion the mix into 6 smaller portions.
4. Shape each portion into a patty and place on a plate, cover with plastic wrap and refrigerate for at least an hour. This helps the salmon hold its shape when it cooks.
5. Heat 2 tbsp's of olive oil over medium high heat and add the patties, cook for approx 3 minutes per side or until golden brown taking care to flip the patties gently.
6. Serve with a wedge of lemon or lemon garlic aioli. (1 tbsp mayo, 1 tsp lemon juice, 1 garlic clove minced, s+p- stir to combine).

Enjoy!
C

Tuesday, October 16, 2012

DIY Polka Dot Banner

Hey!
Sorry for the late post today- e-mails and work up to my eyeballs!

This quick and easy DIY project I did last week for a friends 25th Surprise Birthday. Maybe a tad young for the occasion- but it was festive and can be easily customized based on the paper you choose.

 
You can find pretty paper and shape punches at your local craft store (I found all of mine at Michael's). You will want to purchase a circle punch, and a small hole punch for this project because it will make your life a whole lot simpler!
 
1. Start out with all of your materials, coloured paper, twine or string, a small whole punch (1/8") and a large circle punch (2 1/2")
2. Punch out circles, using your circle punch.
3. Punch 2 holes about 1" apart and a 1/4" in from the edge of the circle for your twine
4. Thread your circles onto the twine, leaving about 7" at each end for tying and hanging
5. Hang your banners up in a zig-zag or 'x' pattern for maximum effect!
 
Michael's has so many different patterned paper, even sparkly ones. This would be a great craft to do with kids too!
 
Enjoy,
C


Monday, October 15, 2012

4 Things

1| Thee most fabulous knocker (a brass whale!) on a beautiful New England style home on Beacon Hill I saw while touring around Boston last weekend.
2| An easy and cute homemade garland DIY I threw together for a friends surprise party- I will share the how-to this week!
3| A fun, mod kitchen design that I put together is almost complete! (Yes, those lowers are Navy- and Divine!)
4| Homemade Red Velvet cupcakes for a special friend. I have finally found the perfect piping tip for cupcakes and totally pumped about it!

xoC 

Starting Up Again... Again...

Our First Sunset in Mykonos

Hi Readers!
I know, yet again I have taken a sizable hiatus from my blog. You probably saw my last post, that explained where I have been. I am now married, Dave and I took an incredible honeymoon to Greece (island hopped between Mykonos, Ios and Santorini), got home and went straight off to Boston for Canadian Thanksgiving with some family. It is finally back to reality and I am welcoming it with open arms!
I am working away on design projects right now, projects that I have decided I will share weekly with you. But I also want to share DIY projects, recipes, and my favorite things. Please bare with me for a bit, while I dabble in a few things!
I am excited about being back and can't wait to share everything I have been working on.

Happy Monday!

C